Showing posts with label British Army. Show all posts

Saturday, April 5, 2025

More Chocolate Box War (CBW) Action

 I have played two more games in the Northern Conspiracy CBW Tournament.  I lost to Earl and his Romanian army pretty badly. Earl maneuvered like a pro and the dice really deserted me at key points of the game. As a result, Earl destroyed 9 of my stands and I only destroyed four of his. A real trouncing in CBW. 

In a game last night the Intervention Division took on AJ’s Austrian army at AJ’s game room.  Here is a selection of pictures from the game.

AJ and his beautifully painted Austrian forces the Grenadiers supporting line regiments and artillery.

Here I am making initial moves forward to seize a hill that would play a key roll in the remainder of the battle. 


The 41st Regiment of foot moved well forward to bring fire on Austrian infantry and artillery. They are ably supported by the 24th Foot. 

The 55th foot and 38th Foot support the light RA battery.

The 38th Foot (1st Staffordshire) move up in column to engage Austrian Line regiments. 

The 55th Foot (Westmoreland) Foot support a RA field and light batteries. AJ would soon destroy the field battery, but the light battery would play a key role in the battle. 

British Foot moving into the firing line.

British position on “Artillery Hill”.

Austrian Volunteer Jagers and Line Battalion defend a small Town. The paint jobs on AJ’s units is simply awesome.

The 41st Regiment of Foot at the forward most point of the British advance. Outflanked by Austrian cavalry and facing superior numbers of Austrian infantry supported by guns, the battalion managed to maintain their position and stop the Austrian advance. 

A great shot down the of battle line from the British right flank.

The battle was a tale of streaking dice rolls. AJ really had me on the ropes early in the game then my dice heated up and his went very cold. I think maneuvering was well done on both sides. General dice just had his say. 

Overall another great game experience with Chocolate Box Wars rules system. 


Monday, March 17, 2025

Lots of Gaming Lately

 I have been playing games lately - just haven’t been able to do battle reports. Over the past three weeks I have played  two WWII era games of One Hour Skirmish Wargames. I also played one game of Brother Against Brother  and one game of Chocolate Box Wars.

Here are some random pictures of the games (Note: As I uploaded these, I realized I don’t have any of the OHSW games.  I’ll see if any of the other players took any and share later.)


Setting up the Brother Against Brother (BAB) game. Setting is the Indian Mutiny with the British moving to relieve the siege of Lucknow. TONS of TROOPS!!!

Nobody said the British were going to have an easy go of it! The objective is to cross the table and get over the bridge. Lots of Mutineers in the way. 

About half way through.  2d10’s worth of movement is excruciatingly slow!

When we called it a night. We made it about halfway across the board. It was bloody with lots of losses on both sides. Ralph did an excellent job of getting as far as he did while blasting away at the rouges trying to stop us. 

My Chocolate Box Wars game with Charlie.  It was the first game for both of us in our club round robin tournament campaign. I am using a British Interventionist division circa 1866 and Charlie has a Franco-Prussian era division. Here is my initial deployment. 

Early game.  Both of us moved on our left flanks in strength. 

My light cavalry squadrons did excellent flank guard work on both sides of the army. They destroyed or helped destroy three stands of Charlie’s forces. 

Late game. I tried so many times to get one more hit on Charlie’s badly shot up stand!  At the beginning of the next turn I finally put the last hit on him and ended the game. 

Here is the final location of the survivors. It was a, “short sharp action,” to be sure. Good thing we can re-constitute the division for the next game or we would be in a world of hurt!

All in all both of these games, and the One Hour Skirmish games were loads of fun.

Thursday, December 26, 2024

Chocolate Box Wars - First Armies

 I have been playing a lot of Chocolate Box Wars (CBW) during 2024.  This is a set of homegrown rules by my friend Ed of Ed M’s Wargames Meanderings blog https://edmwargamemeanderings.blogspot.com/. You can find everything about CBW including rules, playing aids and extensive material on building forces in different areas around the world. This is a great game focused on the mid 19th Century (1840-1880) rifle-dominated battlefield. There were a myriad of wars, small and large, where weapons became more deadly and leaders struggled to determine the best tactics for the new age.

Ed and others in our gaming club are collecting and building European based armies.  Just so we have more options for gaming, I decided to focus on N. America.  My first army is the Union Army of the American Civil War (ACW).  Here are some photos of my Union troops:


Here is my complete Union Army ready for combat.  


My Union army is composed of (left to right) four regular infantry regiments, the Berdan Sharpshooters, a Zouave regiment, Iron Brigade regiment and artillery battery, 2nd Dragoons cavalry regiment, a command stand and an ADC (second in command) stand.


A work in progress shot of my Iron Brigade veteran infantry unit. 

Work in progress of my Union artillery battery. 


Having the Union Army, I now needed an opposing force.  I decided to raise a British force based on the excellent Perry Miniatures British Interventionist Forces. With the Fenian movement threatening an invasion of Canada at the end of the ACW, the British moved several units to reinforce Canadian militia units along the Niagara Peninsula.  The British were also supportive of the Confederacy and so these forces along the northern border could have engaged in combat with Federal forces.  In fact, I am working on a scenario for a future club game night that I call ‘The 2nd Battle of Lundy’s Lane’ with an 1866 version of the War of 1812 battle.  Here are some photos of my British CBW forces:


My British Army ready for battle!

My British Army is made up of (from left to right) a Confederate infantry regiment Auxiliary unit, four regular infantry units (including a Gurkha battalion), a Royal Artillery battery, the combined Guards light Coys, the 42nd Royal Highlanders veteran regiment, the 11th Hussars and my commander and ADC.


A work in progress of my British 11th Hussar Regiment.

A work in progress of the combined Guard light companies which is my light regiment. 

These forces are great base forces for my CBW armies. I am adding to them and will publish more photos as I get into 2025. I also have a new front on the N. American area of operation. I am currently basing forces for a Maximillian Adventure of my own - a ‘What if?’ of the Union Army chasing Franco-Mexican Imperial forces along the Rio Grande River.  Who knows, maybe some rouge Texas Confederates will join the Imperial cause in fight the hated ‘Bluebellies’!


Thursday, November 28, 2019

World War Two Games

Over the past week I have had an opportunity to play two games of Iron Cross WWII. Both of them turned out very well.

The first game was at our monthly club game night hosted by my friend Charlie G.  The battle was an infantry and armor assault by New Zealand and Indian forces against the town of Cassino being defended by Falschirmjagers.

Here are some photos of the game

The entire table.  The British started on the near edge (Indian Infantry Company) and the right edge of the table (New Zealand Infantry Company and Armor Platoon).  The Germans (three reduced Falschirmjager Infantry Companies) set up within the town. 

The German command check the rules to see if they are short of MG42's!!  The Machine Gun squads would definitely play a huge role in the defensive plan.

The Allies look forlorn as (l to r) Bob, John, Ralph and Phil [just off-camera] endure yet another round of MG fire into their vulnerable infantry.  Just a couple of turns later they would be celebrating the victory as John moved up their armor and destroyed the German AT gun position.
The Allied attack developed slowly with the Indian units pushing in from the German left flank.  The New Zealanders moved very slowly but kept some pressure on the German front.  Being the first to attack, the Indians paid a heavy price as two machine gun squads tore into them.  Just as the Indian attack started to falter, one of the New Zealand companies rushed the right front part of the German defense and made it into the cover of some ruins without any casualties.  At the same time the Armor Platoon made a move up their right flank in an effort to assist the Indians.  The bold move did cost the tankers one Sherman as they advanced, but they pressed the attack.  Once the armor made it to the German flank, the Green Devils were not able to hit either of the remaining metal monsters with effective AT fire and the German AT gun position could not pivot to bring fire on the enemy.  In the end the AT position was destroyed giving the Allies a minor victory.  The win did cost the Allies dearly with almost two companies rendered combat ineffective and 1/3 of the armor force destroyed.

In the second game I had friends visit the house.  Andrew, his son Thomas and their friend Shaun visited and I set up a German vs British scenario to let them play the game for the first time.  Shaun and Thomas played with a couple of reinforced platoons against Andrew and I pushing British Commandos supported by a some armor assets.  The forces were exactly equal in numbers and composition.

Here are some photos of the game in progress:

The British try to push a flank using their Daimler Armored Car.  This would be the best shot of the game as the Daimler took out the German Armored Car with a very difficult shot.  I love it when Andrew S. rolls a 'six' at just the right time!  Unfortunately, it was just about the only positive aspect of the game for the Brits. 
The overview of the Armored Car shot up the left flank of the British advance.

The German Recon Platoon advances under the cover of an MG42 Support Squad.
Commando infantry take a commanding overwatch position on a hill.  In the distance, the Germans begin their well planned attack.

The British of 2 Commando push forward to seize a building enclosure and small woods.

A Commando Vickers MG Support Squad covers as a Commando Squad moves up.  Unfortunately, the infantry faltered a the wall and spent two full turns trying to get over the obstacle.  Their hesitation was a major negative factor on the British Advance.
This was a pretty one-sided game as Shaun and Thomas handed Andrew and I a real drubbing.  They had a better plan than we did; they moved better than we did; and they rolled their dice lights-out.  We played along the long axis of the table - and that made it a much more of a slugging match.  Not much room for maneuver.  But the Germans made the most of the terrain and with a slow advance by us British, the game was one-sided.

I'd like to highlight the game mat that we used for this game.  It is my new Killing Fields Static Grass mat that I just purchased.  I love the way the looks and mixes in with my other terrain and buildings.  If you like it, check out the Killing Field site HERE to get your own.

Club members and my friends really enjoy Iron Cross for our WWII skirmish/tactical gaming.  It is fast paced and the ability to distribute command tokens and activate units in any way during a turn makes players fully engaged in the game at all times.  I highly recommend that if you have an opportunity to play Iron Cross that you give it a try.


Sunday, July 15, 2018

HISTORICON 2018

Friends from he Northern Conspiracy and I have been enjoying a trip to HISTORICON for the past few days.  Whe started with a side trip to West Point where I filled them in on a few facts and we enjoyed touring Trophy Point and checking out all of the ordinance that is located there.  It was the first time to the Academy for all of these guys and they really seemed to enjoy themselves.

The next day we all traveled the rest of the way to Lancaster and secured our rooms at the Host Resort.  The Resort is undergoing major renovations.  The rooms we got have already been renovated
and I must say they are very nice.

Games are on the up or down scale.  But as these photos show, there are some really nice ones:


I played in two games over the weekend.  The first was a War of 1812 skirmish game using the rules, "Redcoats and Blue Jackets".  I played the role of a Canadian Militia Officer as our force tried to prevent some Americans from re-supplying General Hull around Detroit.  We won the game in just about the exact historical way the British and Canadians defeated the Americans.  Here are a couple of pics of the game in progress:

The Americans move their wagons along a track through the swamps around Detroit.

The British and Indian Allies block the Americans' path.  My force is the one on the left with the red 'reload' marker.


The Native Americans close asset the wagons while the British and Canadians provide fire support. 

The Native Americans finish off the Americans and the game goes to the Brits!

I have never played the rules before but I really enjoyed them.  It is always easier to play when the author of the rules is the game master!

I also played in a WWII game set in the Western Desert using the rules set 'Fireball Forward!'  The scenario was called "The Witches Cauldron," and was set around the battle of Trobruk as the German armor tries to escape through the British field artillery line after failing to take the port.

Here are some photos:


Again, I had never played the rules before, but I really enjoyed them.  The game master and all of the other players at the table were excellent gamers and very friendly.  I played on the British side commanding a small force of A-10 Cruisers.  I managed to roll my usual very poor dice, but at the end of the game I made the final kill with a two-pounder into the back of a Pzkw III.

I have to say that manners of the gamers was excellent in both of the games that I played in.  I was very pleased about that as it can be a crap shoot during such a large convention and I have had some really bad experiences in the past.

Overall, I have to say that it was an excellent convention.  I am looking forward to our battlefield excursion on the way home as we visit Gettysburg.

Saturday, September 2, 2017

Finally Back On-line - Chosen Men Game Report

Well, it has been a long time away, but I am finally back!  I have had a great summer doing some traveling and having many visitors at the house.  It has been a good time, and now as fall is on the horizon and the trees start to change from green to various tones of yellow and red, I am returning to the hobby table.

Last night I traveled to Manchester and tried out the new (for us) Chosen Men rules from Osprey Publishing with my friend Gordon.  We did a pretty simple scenario using my War of 1812 figures.  Gordon played the British and I handled the Americans.

The British had two infantry squads, a Major Commanding Officer and a single Spy (horse mounted). As the Americans, I had a Major Commander, two infantry squads and a half/squad of Riflemen.

Gordon set up a great looking table.  Because we were both playing our first game of CM we took it very slow and basically read through the rules as we played the game.

Here is a couple of photos of the game as we came together at the end of Turn 1.

Americans on the right and British/Canadians on the left.  The Americans defended the wall very effectively and  we used the 'Feint' strategy to make the British Light Infantry squad to break cover and charge.  They ended up being short of the Americans during the charge and were out in the open to be fired on.  Gordon decided to try and shoot it out with the Americans and even with his great rolling, the wall provided enough cover to leave the Americans in possession of the wall at the end of the game.


I did not take any other photos as we were spending so much time reviewing rules and concentrating on the game itself.

The rules themselves are pretty interesting.  We each had four units and that seemed to be about right for what a new player can handle within an evening game for fun.  We played about three and a half hours of actual game time.  We played through five turns during the game and by the end of the game I think I had a pretty good sense of how to play.

The game mechanics are interesting with an alternating of units moving through its actions then an opponent's unit getting to play and back and forth until all units have moved.  That is one turn.

Infantry fire combat is a bit cumbersome with three die rolls, hits-saves-kills.  It could probably be reduced to two rolls if modifiers were inserted at one or two levels, but if you are doing a beer & pretzels type of fun game have fun rolling your hearts out!

The other thing we learned is that cavalry is particularly effective against exposed infantry.  On two occasions Gordon killed several infantrymen with a single mounted figure (including all of the half squad of riflemen).  Infantry needs to be in the correct formation and needs to be under strong leadership to be effective against cavalry to their front.  We think that the Hold and Fire order is one of the potentially effective ways for infantry to confront cavalry.  Once contact is made by charging cavalry, they will be devastating on an infantry squad.  Of course, Gordon was rolling lights out, so that may have been part of the outcome.  Sometimes you can't fight General Dice!

We also noticed that as casualties increase the morale checks come more and more often. Gordon faced this with his Light Infantry in front of the wall.  He passed several checks but as the unit took additional casualties, he had to take more checks and he finally broke.

I like the rules.  I hope to have a slightly larger game sometime soon.  I hope the second game goes as well as this first attempt.

Saturday, October 29, 2016

Another Bolt Action Game

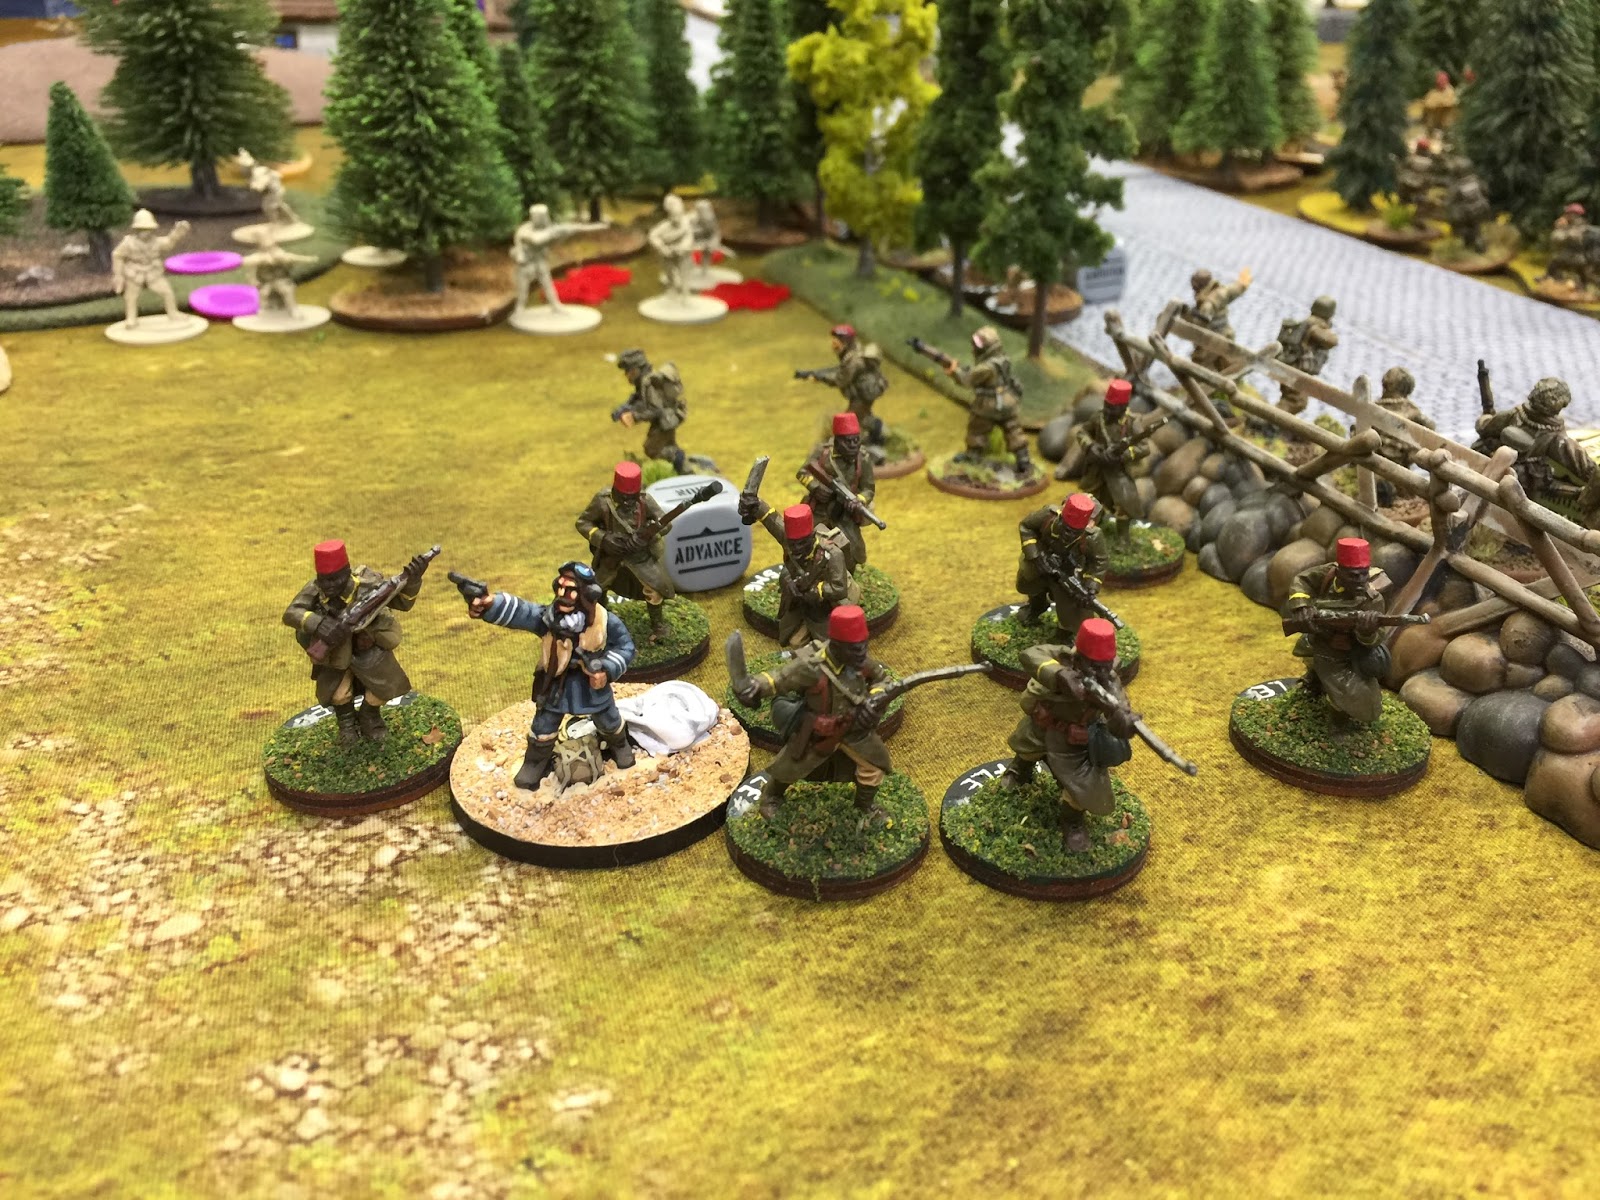
I had a chance to play a Bolt Action at Adler's Gaming Cafe last night.  It was a great time with Walt and I taking on Gordon and his Fascist Italian Hordes.  Set in a very European looking part of Tunisia, the roughly 1500 point game pitted Walt's excellent British Paras and my French Foreign Legion forces against a very stout Italian Army.  As Walt observed during the game, "what a game - all kinds of weird vehicles, cavalry and sixteen different nationalities!"  I could not have said it better!

We rolled for the scenario and came up with "Top Secret"  First time playing it for both Walt and myself.  Gordon provided a really nicely painted British pilot as the objective marker and we lined up the troops for a game of Capture the Flag a la World War Two!

The game went back and forth with my usual crappy dice rolling continuing from the very start (What is it about my mojo when playing against Gordon?).  But after a couple of hiccups I managed to get on track.

I have some photos below of the game.  Basically, my Veteran Legion Cavalry from the 1er Regiment Etranger de Cavalrie (1st REC) went out fast and secured the pilot.  Gordon had trouble getting squads on the board at the beginning of the game failing to get his Camel-mounted Squad (yes, camels in the pine forests of Tunisia!) and his Cavalry Squad on the table for a turn or two.  As the Italians drank their cappuccinos, I got to the pilot and it looked like a quick Allied victory.  Then the Italian artillery came alive and 1st REC was reduced to three figures with 4 pin markers!

The middle part of the game saw me move my inexperienced Senegalese Tirallieurs up to support 1st REC while dodging artillery shells, a Bersaglieri squad, and Gordon's second version of his dreaded flamethrower tank!  A couple of lucky moves where Gordon missed with the flamethrower (thank you BA version 2!) and the objective was handed off from the cavalry to the Senegalese.  The race was on.  Walt assisted greatly by killing Gordon's Semovente with his PIAT team, claiming that it was the first time that they had ever killed anything!

The game came down to the last order dice of the last turn with Gordon frantically trying to put a couple of pins on my Tirallieurs running off the board with the aforementioned British Pilot.  Fortunately all of his rolls were whiffs!  Walt stepped in to cover my retreat by putting a squad of Paras between the Senegalese and Gordon's dismounted camel jockeys and the game was a squeaker of an Allied victory.

Here are the pics:

1st REC makes a dash for the downed British pilot hiding in the woods!

Other French troops move up in support of the cavalry in the Forest of Death.  Note the Anti-tank gun dead on the  road on the right

One Italian Artillery shot, many dead French Cavalrymen!  The Senegalese move up to try to  help.  The Semovente is at the top right and the Italian crazy Camel Corps is at the top center moving in to push the French off the objective.  In an action reminiscent of Camerone the Foreign Legion cavalry defended the Forest of Death to literally the last man and got the pilot to the Senegalese.

Another view of the Forest of Death.  Note the Historique pin marker in the center with the Free French emblem.  I really like these markers.

Walt's Paras move up to put pressure on the Italians so they can't bring as much firepower to bear on my hapless French in the trees.  The brave PIAT team is just visible at the top left of the photo preparing to take out the Semovente.

Camels in a pine forest?  Where are they all coming from?  The dead marker in the bottom left was my artillery observer killed by a massive volley from the Bersaglieri just out of the photo to the left.

Objective hand-off!  Note burning Semovente in the upper right - thank you PIAT team!

My French Armored Car sacrifices itself to try and block the Flamethrower Tank and effect the Senegalese squad's escape with the prize.  Walt's Paras also try to get themselves between the Senegalese and their Italian pursuers.

Gordon's desperate attempts to stop my fleeing Tiralleiurs.  The Flamethrower misses, the Cavalry Squad and Bersalieri chase from the left.  It is a swirling melee!

Last turn and we have made it!  Flight Lieutenant Bromhead-Smythe is saved!  But he will suffer greatly in the coming years after seeing all of the carnage that his French allies and British brothers in arms had to endure so that he could be rescued!
A great looking table, nice miniatures all around and a really fun game!  Thank you so much to Gordon and Walt for a great time.  Can't wait for the next game!